Monday 22 August 2011

Summer Besties Tag.

What are your favourites:

1) Lip products?
Oo.. for the summer, I'm loving Barry M's TMLF. It's green in the tube and once you apply it one your lips it turns pink according to how much alkaline you have apparently so (i think). ♥

2) Blushes?
It's not just my summer favourite, it's an all time favourite- it's the No 7 one in Coral Flush.. as the name suggests it really is just a flush of colour but a gorgeous natural colour. (I have hit pan- you can see the tiniest bit of metal- eeek! exciting!)

3) Nail polish/products?
This list is gonna be pretty long.. here goes..
I'm loving: mememe polish in Laura (the orange one), George polishes in Buttercup Shine (yellow one) and Cloudless Sky (blue one), Rimmel London polish in Green Grass (green one) and Maybelline polish in Raspberry Punch (the pink one).

4) Liquid face makeup?
I don't actually own and liquid face makeups- not a foundation girl.. yet.
Oh wait.. if the Benefit High Beam counts.. I love this stuff!

5) Powder face makeup?
Again, I don't own powder face products- not a powder girl either.. I like to let my face breathe. (while I try and get rid of my acne scars and bumps)
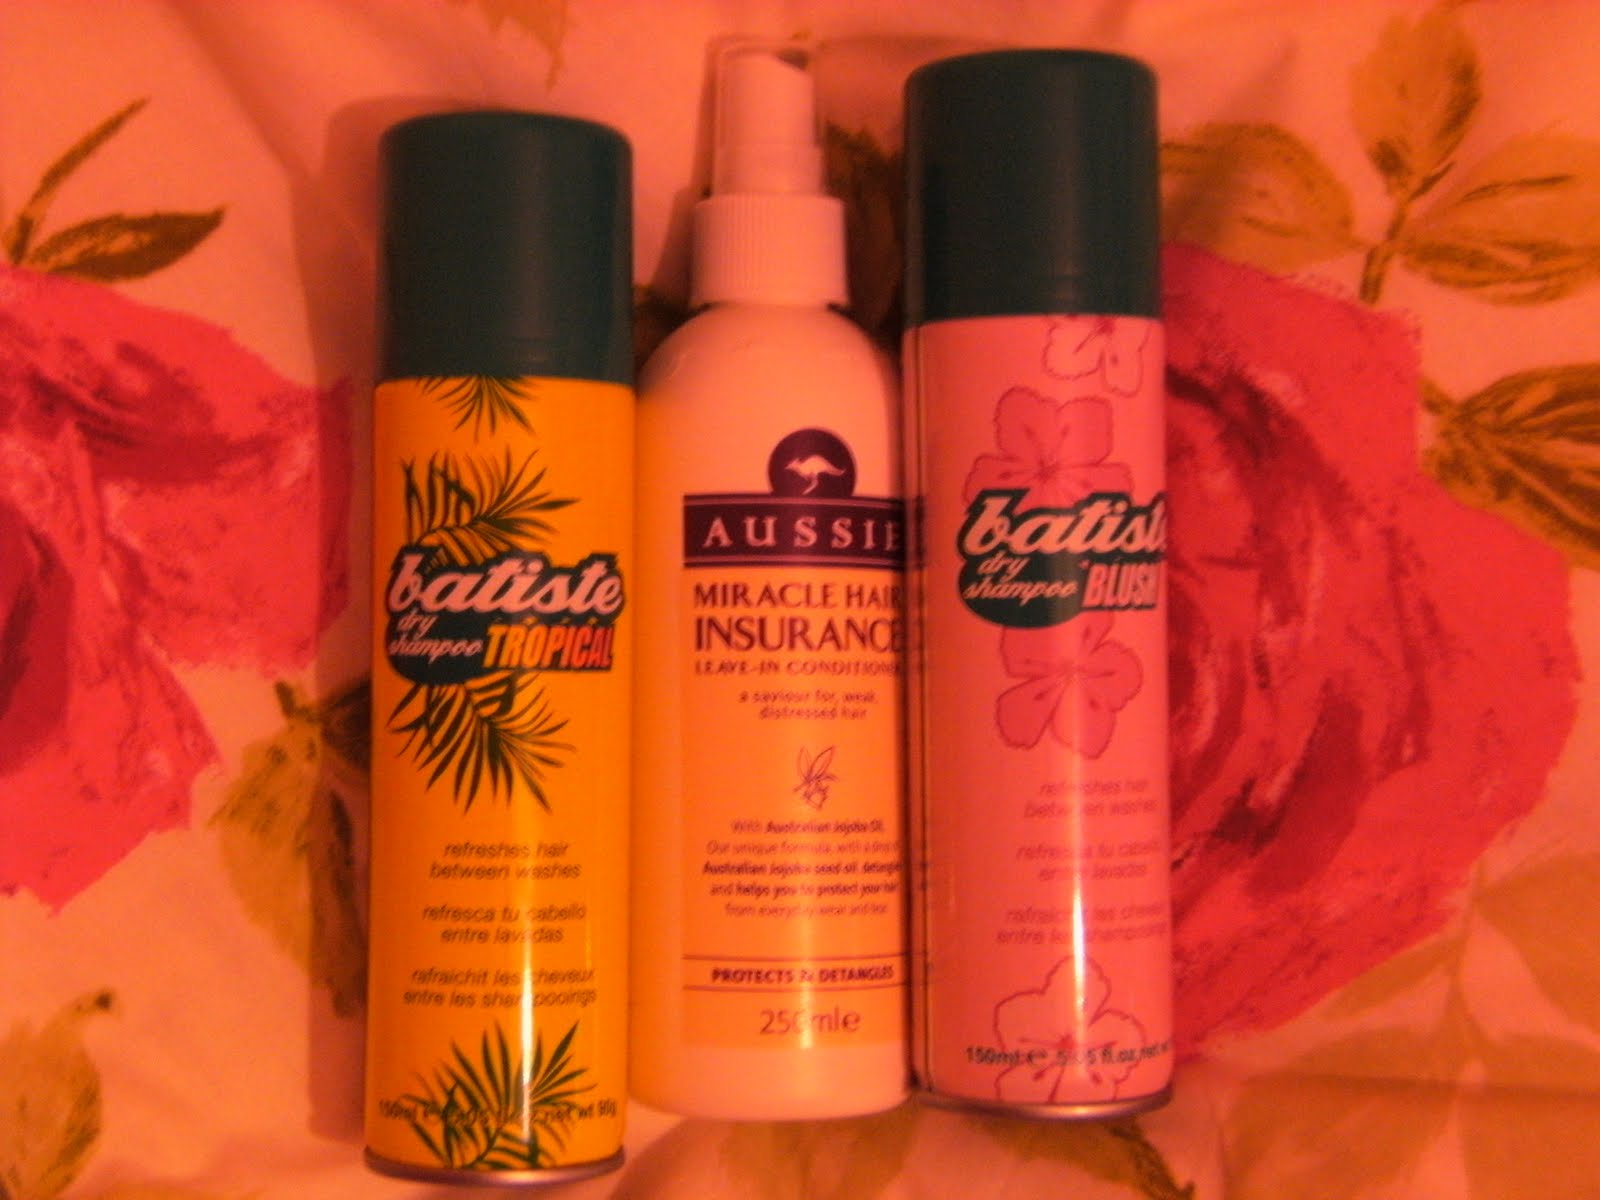
6) Hair products?
Naked Shine treatment with coconut and Shea butter, Batiste Dry Shampoo & Aussie Leave in conditioner.

7) Eye products?
From left to right.. Maybelline Volume Express Mascara, Benefit Eye Bright, Loreal Carbon Liner, No 7 Eyeliner in Green, Eyeko Line and Shine (Electric Blue and Teal) and Urban Decay 24 7 Eyeliners in Yeyo and Zero.

8) Tanning products?
I don't use tanning products.. Don't need it, I'm naturally brown skinned. :)

9) Accessories?
My gladiator Sandals from Primark and my flip flops from George. 
My flower reef from Primark- so pretty and summery.


10) Clothing Items?
Maxi skirts from H&M- even though it's black- it's amazingly airy haha.
and sheer material clothing and of course dresses!

What are your favourites for this summer?


Friday 19 August 2011

Storage Ideas : Earings and Necklaces.

Organisation is a must when it comes to ensuring you use every item that you have.. well for me anyway. If I can't see it, I most probably won't use it.. and that's why I think this is the best storage solution for my earrings and necklaces- and hopefully will give you some ideas on ways to store your items.

All you need :
  • Cork Board (you can buy these from supermarkets or stationary stores.. I recently remember seeing them at Tesco and Wilkinson for around a pound- Bargain)
  • Drawing Pins (these can be brought from the same places that you can find the cork board)
  • Earrings & necklaces (even bracelets)
  • Trinket


This is how I've organised my earrings.. they did used to be in straight lines but I actually prefer them a little wonky. I hung my cork board onto the side of my shleves with some strong wool.
These are a selection of my necklaces and I've just hung them from the bottom of the cork board as you can see.
I keep the backings of my earrings in this little trinket that was given to me as a gift.

    Hope you all enjoyed. ♥

    Thursday 18 August 2011

    August Glossy Box 2011 : Show & Tell.

    First things first.. Glossy box is a monthly subscription of £10 a month (£12.95 from September) where they claim to send 5 high end luxury samples straight to your door. It's great as you can discover new products in the comfort of your own home. (A similar concept to the Birch Box which they get in America)  

    After receiving the e-mail confirmation from Glossy Box I knew the box was on its way.. usually it takes about 2 days for it to come to my door and I've actually stayed up to open it and of course write up this blog! (I had work early morning and need a nap as I've only had 3-4 hours sleep last night) Anyhoo here goes (ps. excuse the bad camera quality.. haven't got the Nikon today)

    Furthermore.. i won't be able to give reviews as I haven't tried or tested them yet- sorry..

     
     I did take individual photos of the products because the focus was awful :\ 

    But I do hope this photo shows everything I got...
    1. KMS California : Hairstay Style Boost - This acts as a primer for your hair which I think is going to be rather interesting to use! I may see what it's like on its own first and then use it with other products! This is a full sized product and retails for a whopping £13.40.
    2. AHAVA : Mineral body lotion -  this is part of their new skin care range and claims to hydrate, nourish and protect the skin. I received a 40ml product- retails for £19.80 for a 250ml bottle. To receive 10% off on the Mineral Body Lotion just visit www.Ahava.co.uk (expires 31st August)
    3. Rebel Nails : Nail Wraps - This is great as it comes in different sizes- sure to fit anyone's nails! They are meant to be easy to apply, long lasting and kind to your nails! They aren't meant to chip, fade or wear which I think, if it really does last I may just get myself a few more of these! This particular one that i received retails for £7.99. To receive 15% off visit www.rebelnails.co.uk (expires 1st December)
    4. Murad : Time Release Blemish Cleanser - This retails for £29.00 for a 200ml bottle. I've googled this product and the reviews are great! Can't wait to try this badboy out! :) You can receive 33% off and free delivery with the code MURADGB when you visit www.murad.co.uk (expires 10th September)
    5. Danial Sandler : Baby jet mascara - This mascara retails for £12.80 the wand is absolutely tiddly! I've already got mascara on today so will definitely be trying this out tomorrow! (You can use the voucher code DSGB10 to receive 10% off and free delivery when you visit www.beautique.com)
    All in all, this box totals up to a lot of money and I really do believe Glossy Box and proving to be very good at what they do! If you want to receive this box all you have to do is visit their website and join for monthly subscriptions at http://www.glossybox.co.uk/

    If you want more in depth reviews of any of the products do let me know and I'll see what I can do! :)

    I hope you enjoyed and if you receive the lovely Glossy Box- what did you receive?

    Saturday 13 August 2011

    DIY Nail Polish Stand.

    My nail varnish collection has accumulated quite a lot and until now, I haven't stuck to one storage system.. at first they used to fit into a little storage box, but it got bigger, so I had to move it- I lined them up on my shelves- but then my collection got bigger so I put in in a huge cardboard box, but that idea didn't work at all- it was difficult finding the nail polish that I wanted. So I decided to get a little creative and get my DIY mode into gear and as nail polish stands are just a tad too expensive for what they are- I decided to make my own!

    My parents brought my sister some shelves that she decided not to use and didn't want. So I decided to convert the shelves into a nail polish rack. (with a little help from my dad)

    I didn't take photos step by step as it was a little difficult- but the photos I've taken hopefully show the basics of what I used and how I created my nail polish rack/stand.

    What you need to create your own nail polish rack :
    • Pieces of wood (I converted a shelf- but I'm sure you could get strips of wood from DIY stores like B&Q)
    • Screws
    • Screw Driver
    • Drill
    • Drill bits (not sure what you call them- that's where my dad came in)
    • Butches (those plastic things you put into the wall when you're screwing something into the wall)
    • Hammer
    These are the shelf pieces I used- I only ended up using 2 'slabs'.. i will probably have to make another one though. :\
    So with another shelf 'slab' I took apart the strips of wood with a hammer as this was the easiest way to get them off.
    This is what it'll look like half way through the 'pulling off' process..
    After a bit of measuring to see where I wanted the levels of the shelves, my dad screwed them into place with a cordless drill.
    My dad also added 2 strips to the sides to secure it a little more and then drilled the stand onto my wall-  I decided to place it near my desk as it'll be a lot more convenient especially when I want to do different nail art designs on each of my nails!
    So this is what it looks like with the nail polishes. LUCKILY all of my nail polishes fit on the shelf.. I will have to make another one very soon if I carry on buying more polishes! 


    I organised the polishes in order of brand- cause i thought that'd be the best way to do it- instead of doing it in colour order- would have looked a little mumble jumbled!

    I hope this gave you guys a few ideas as to how you'd want to store your polishes!

    Hope you enjoyed! ♥

      Friday 12 August 2011

      Easy Method To Remove Nail Polish.

      Only recently have I started used this technique, and I've only started using it ever since I purchased my Wilko's own brand nail polish remover- I want to tell you now- it's not a very good remover when you're just rubbing it on your nail with a cotton ball or tissue.
      However, even with the worst nail polish removers.. you can get rid of your polish super easily!

      All you need is:
      • Nail polish remover (I used Wilko's own brand)
      • Foil
      • Cotton Wool Balls

       3 simple items you need.

       Step One : Rip a cotton wool ball into 2, drip some nail polish remover on the cotton wool ball- make sure they're not overly soaked.. and then cover your nail with it.

       Step 2 : Rip of little pieces of foil and wrap the cotton balls so they're secure and won't fall off.

       Step 3 : Leave them on your nails for at least 5 minutes.
      When you're removing the foil+cotton combo- just SLIDE it off.
      The picture above just shows what your nails and the cotton ball will look like- pretty cool how it keeps the print in tact! :D

      Hope this helped. ♥

      Thursday 11 August 2011

      Leopard Print Nail Art Tutorial & How To.

      For me, wearing nail polish reflects the mood I'm in.. if I'm feeling happy I'd paint them with bold colourful colours- and to be honest with you, you will very rarely see me with just one colour on my nails. I just LOVE designs. Of course it's a little challenging doing it on my right hand- times like these when I wish I was ambidextrous!

      Well the nail design I'm going to show you is pretty simple and fun and one of my recent favourites- I'm sure it'll be yours pretty soon too!

      All you need : 
      • White Polish (I used 'Natural White' by George)
      • A few colourful nail polishes of your choice (I used, from left to right (ish) in one of the pictures below- 'Green Grass' by Rimmel, Sure Promise- 'Blue', 'Yellow' & 'Purple', 'Princess' from the Girls Aloud collection and 'Laura' by MeMeMe)
      • A dotting tool (I brought these off of eBay for really cheap) (you can use a toothpick, the end of a hair grip)
      • Back Nail Polish (I used Rimmels 'Black Satin')
      • A top coat (I used Sally Hansens 'Mega Shine Extended Wear Top Coat')
       Let's get down to the tutorial..

      Step 1 : Paint all of your nails white- I did 2 coats to get that solid white colour.

      I used this sized dotting tool..

      ... And with these colourful nail polishes...

      Step 2 : You want to create RANDOM dots- don't put them into perfect lines! And you don't have to use every colour on every nail.

      Step 3 : With the smaller end of the dotting tool, you want to outline the dots with a black nail polish. Now, you don't want to do a full circle around the dots, instead you want to do 2 lines around it- 2 semi-circles without joining them up!

      Step 4 : Apply a top coat and you're done! :D

      Let me know if you try this nail design out.


      Monday 8 August 2011

      Waterfall Braid Tutorial - Wear it Down or Up.

      Hey Girlies. Today I'm going to be showing you how I do the waterfall braid.. It was a little difficult taking the photos myself, but I hope it helps! My hair is super dark, so it may be a little difficult to see in comparison to lighter hair- I am going to explain it word to word to the best of my ability! :)

      Good Luck! & here it is..

      Important : Arm position! I know you may not think it's important, but this is the best and easiest way that I found. Place one arm round the back of your head and the other in the front (as shown in the image below).

      Click on the images to make them larger- that way you'll be able to see each step better! :)

       Step 1 : Grab a section of hair and split it into 3 sections.

       Step 2 : Braid the hair a couple of times.. (2 full braids)

      Step 3 : To the top section, add some 'new' hair and braid into the middle.

      Step 4 : Drop the bottom section (make sure not to add this piece back into the braid- this is what creates the 'waterfall effect'!)

      Step 5 : Grab a 'new' section of hair that you haven't already used in the braid.
      Then braid the new section into the middle.

      You want to carry on doing this... So lets repeat it.. add a new section of hair to the top section and braid that into the middle.. Then drop the bottom section, grab a new piece of hair, and braid that into the middle.. keep doing this until you get to...

      The back of your hair should look like this.

       Step 6 : You want to just braid downwards and secure it with a rubber band (preferably the same colour as your hair, but i only had a yellow one, so I used that).

       So this is the finished look!

      Now, I personally prefer to wear my hair up when it's hot and humid, so this is what I've created- and it's easy!

      You start off with the waterfall braid..

       Step 1 : Gather your hair

       Step 2 : 'Roll it' towards your head. Start at the ends of your hair, rolling it upwards and inwards.

       Step 3 : Secure with hair grips and secure any stray hairs or bumps that may have popped up during the process.

      Voila.. your hair should look like this! :)

      Hope you enjoyed and found this helpful! ♥